What is Microsoft Power Automate (Flows)?
Microsoft Power Automate (formerly known as Microsoft Flow) is a powerful cloud service that helps you create automated workflows (called Flows) between your favourite apps and services to synchronise files, get notifications, collect data, and more.
Power Automate lets you bridge the gap between different software, triggering an action in one app based on an event in another.
Why Use Power Automate for SMS?
Integrating Power Automate with the TNZ REST API allows you to automate SMS communication based on events happening in your Microsoft ecosystem and beyond.
This is highly beneficial for:
-
Notifications: Send an immediate SMS to a customer when a form is submitted, an invoice is paid in Dynamics 365, or a task is assigned.
-
Workflows: Automate sending an SMS confirmation after a new entry is created in a SharePoint list.
-
Communication: Use SMS in your communications strategy without writing custom code for every application.
Integration Possibilities with Power Automate
Power Automate is designed to work with a vast array of services and applications, allowing you to use almost any event as a trigger to send a TNZ SMS. Some of the most common applications include:
-
Microsoft Dynamics 365: Trigger an SMS notification when a Lead is qualified, a Case is updated, or a Sales Order is created.
-
Microsoft Forms: Send an automated SMS to the submitter (if they provide their number) or an internal team when a new survey or support request is submitted.
-
SharePoint: Send an alert when a new item is added to a List or a document is approved in a Library.
-
Outlook: Send an SMS alert for an urgent email from a specific sender.
-
Other Services: Connect to hundreds of services like Twitter, Salesforce, Dropbox, and more.
Setting Up a Flow to Trigger a TNZ SMS
To send an SMS, you'll use the HTTP action within Power Automate to make a POST request to the TNZ SMS API endpoint.
Note: The HTTP actions are typically a premium feature and requires a Power Automate license.
1. Access Power Automate
Go to the Power Automate portal and sign in with your Microsoft account.
2. Create a New Flow
-
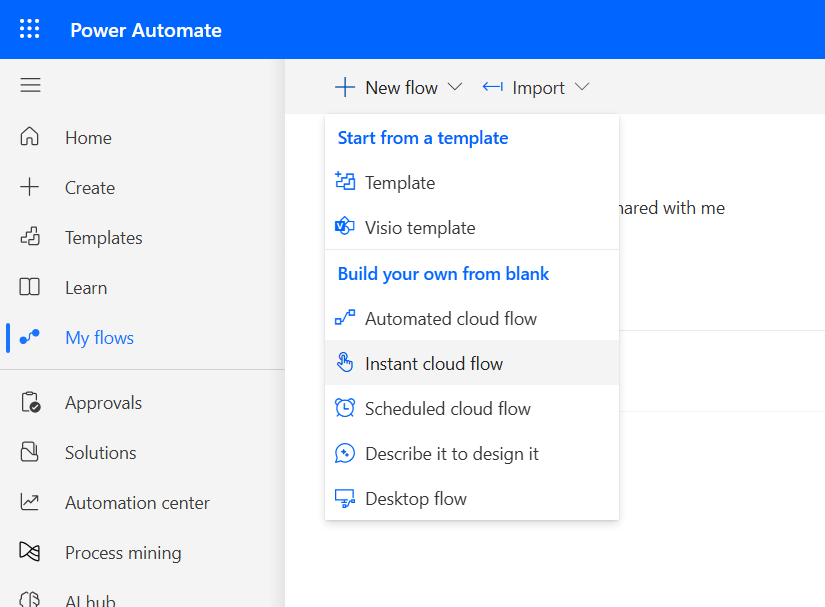
Select + Create from the left navigation pane.
-
Choose your preferred flow (in this example, we'll use the Instant cloud flow).
-
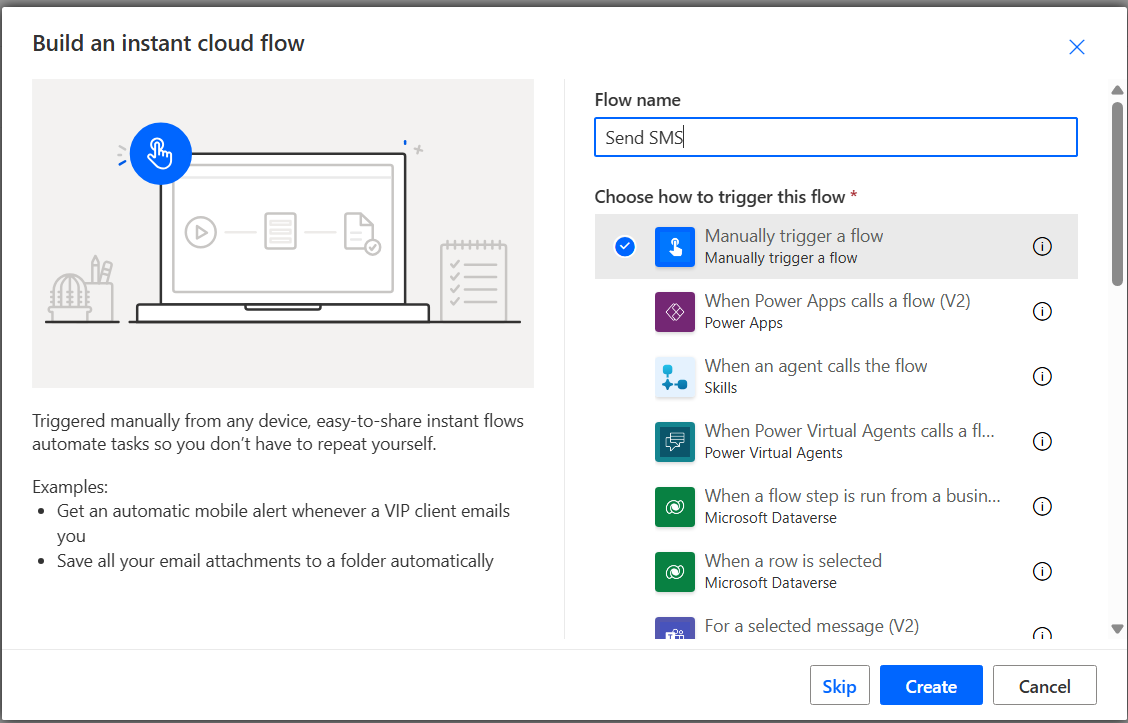
Enter a Flow name (e.g., "SMS Sender").
-
Choose your desired trigger (in this example, we'll use Manually trigger a flow) and click Create.
3. Add the HTTP Action
-
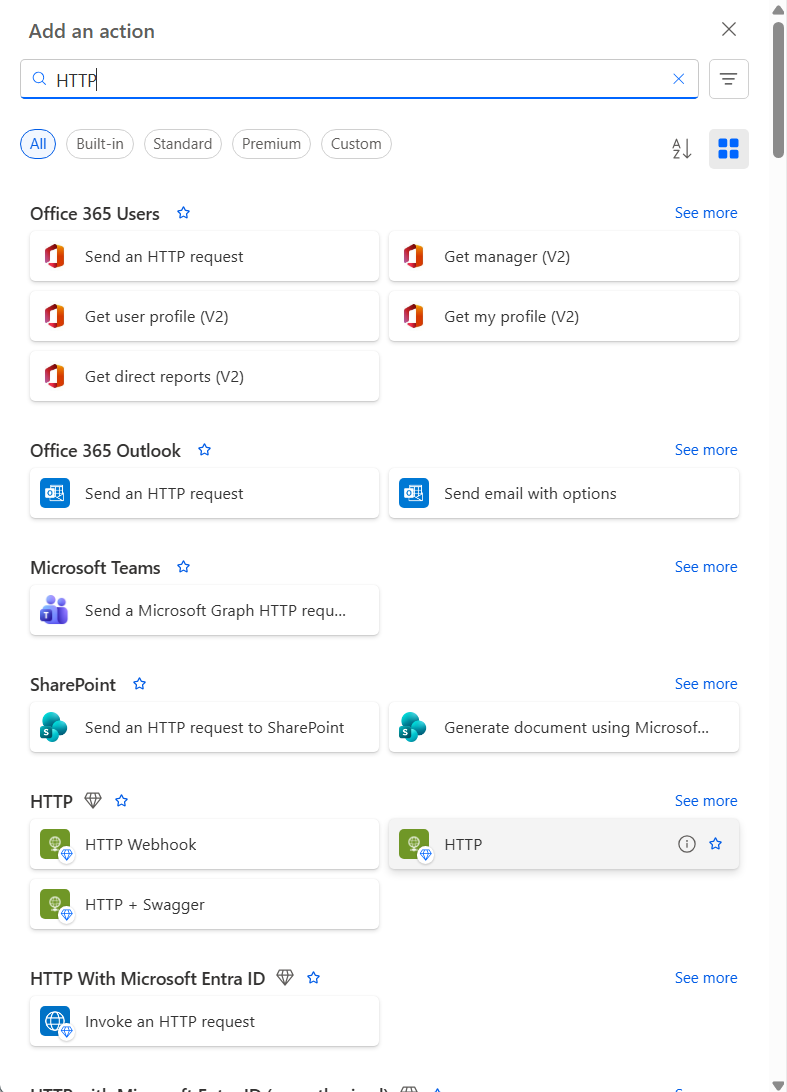
Click + New step.
-
Search for HTTP and select the standard HTTP action (ensure you are using the core HTTP action, not a specific one like 'Office 365 Outlook | Send an HTTP Request').
-
Click on the HTTP action to expand it.
4. Configure the HTTP Action
| Parameter |
Value |
Description |
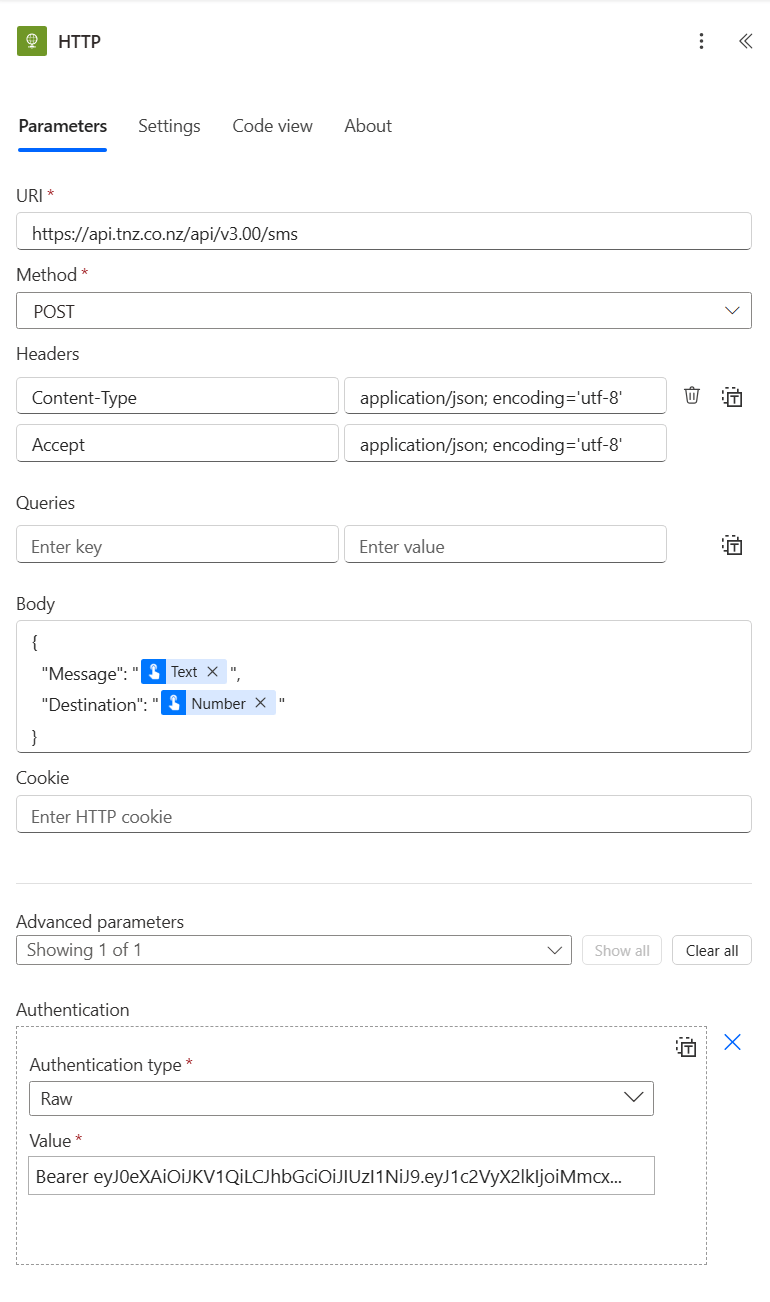
| URI |
https://api.tnz.co.nz/api/v3.00/sms |
The TNZ API URL |
| Method |
POST |
The type of HTTP request |
| Headers |
Content Type: application/json; encoding='utf-8'
Accept: application/json; encoding='utf-8' |
Standard HTTP Headers |
| Body |
{
"Message": "@{triggerBody()?['text']}",
"Destination": "@{triggerBody()?['number']}"
} |
The body contains the message payload. You can insert Dynamic Content (like a phone number from a Form submission or a user name from the flow trigger) by placing your cursor in the field and pressing the / key or clicking the Dynamic content option. |
| Advanced parameters > Authentication |
Authentication type: raw
Value: bearer eyJ0eXAiOiJKV1QiLCJ... |
Change the value to your actual TNZ Auth Token. This token authenticates your request. To find your Auth Token, see: Auth Token |
Your result should look similar to:
6. Save and Test the Flow
Setting Up a Flow to Check for Received SMS Messages
TNZ can fire a webhook when a message is received. Use the Power Automate HTTP Request function to catch and report on these webhooks.
Note: The HTTP actions are typically a premium feature and requires a Power Automate license.
1. Access Power Automate
Go to the Power Automate portal and sign in with your Microsoft account.
2. Create a New Flow
-
Select + Create from the left navigation pane.
-
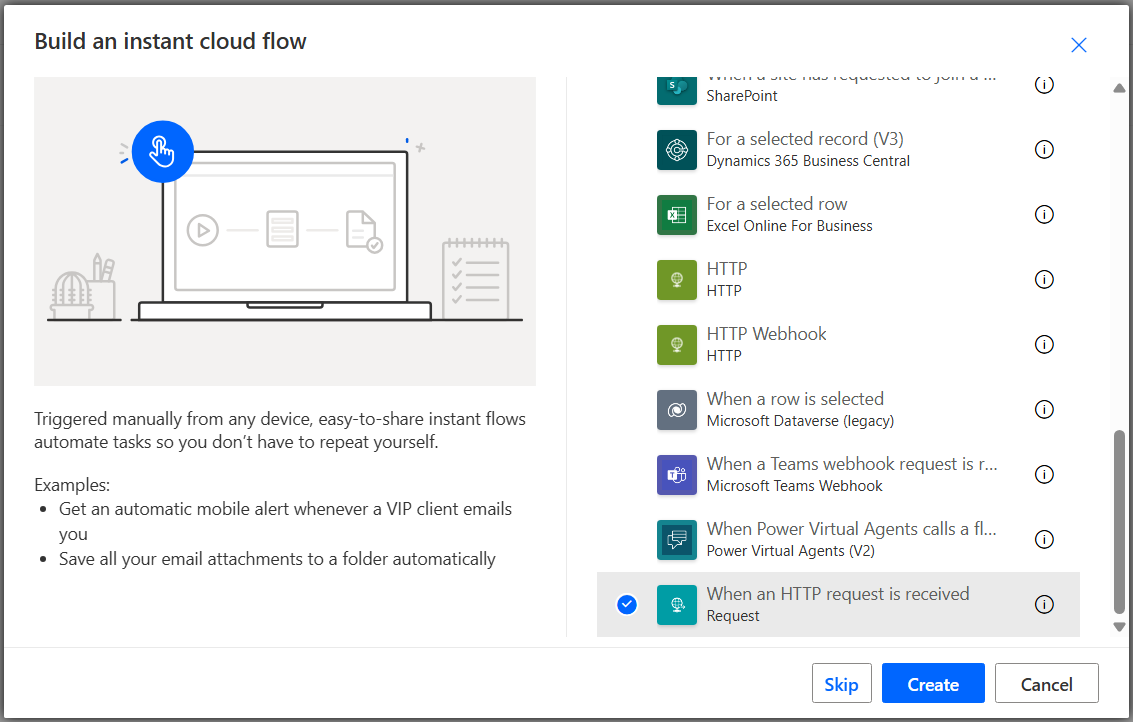
Choose your preferred flow (in this example, we'll use the Instant cloud flow).
-
Enter a Flow name (e.g. "SMS Receiver").
-
Select When an HTTP request is received and click Create.
3. Add the HTTP Action
-
Click on the HTTP step ("manual")
- Rename the step (e.g. "Receive SMS")
- Set Who can trigger the flow to Anyone
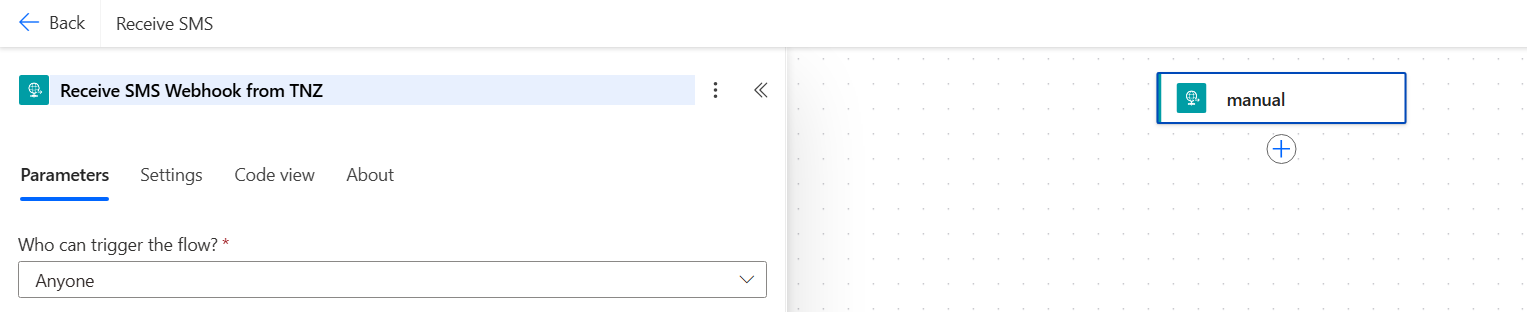
- Paste the following JSON data into the Request Body JSON Schema:
Your Trigger node is ready!
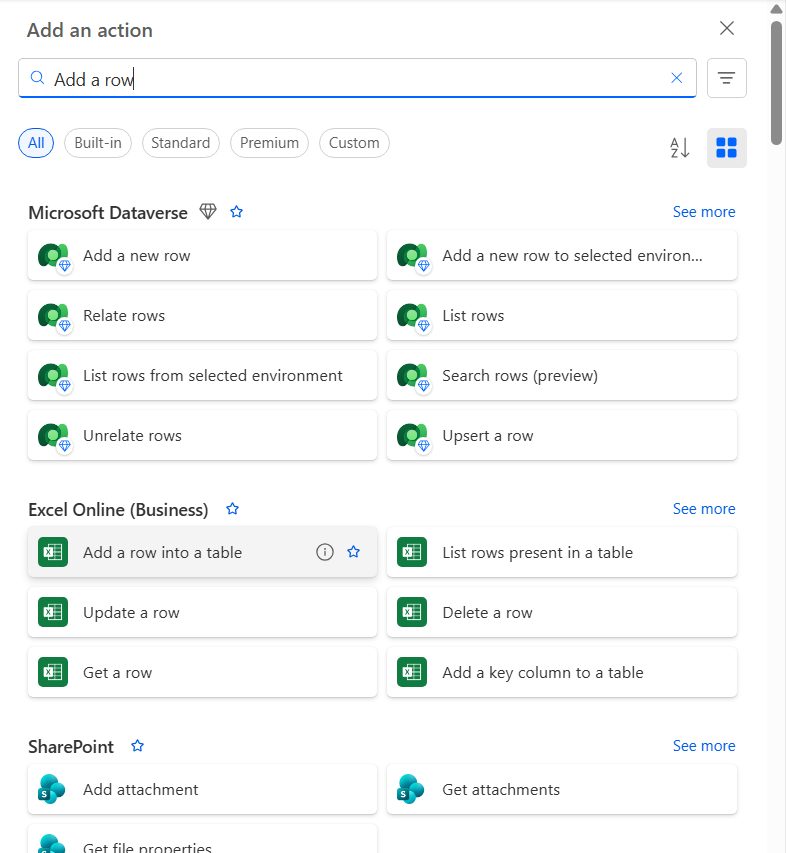
-
Set up an appropriate Action, such as Adding a row into a spreadsheet table.
-
Save the Flow.
-
Open the Receive SMS Webhook from TNZ step and copy the HTTP URL.
4. Use the new Webhook URL
Finally, you'll need to tell TNZ about your new Webhook URL.
-
Log in to the TNZ Dashboard.
-
Navigate to Users and select the specific User.
-
Click on the API tab.
- Configure the following options:
- Webhook Callback URL: The Power Automate destination URL
- Webhook Callback Format: Select 'JSON'
- Webhook Callback Version: Select 'v3.00'
- SMS Reply Report Method: Select 'Webhooks'
Other values can remain their defaults.
For more information, see: Configuring API Webhooks